 |
  |
|
|
| Inset
lines can really be a cool effect on your designs and interfaces.
Here I will show you how to make them :-)
Start with opening your image.
|
||
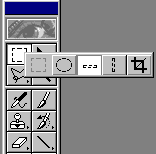
| Place
the singel maquee tool on your image. If you want to move the selection
just use the arrow keys. One touch at the arrowkeys = 1 pixel.
Your image should look something like fig. 2.
|
||
| Create
a new layer. Make black your foreground colour and select the Paintbucket Tool. Fill your selection with black. Now create a new layer. Make white your foreground colour and fill the selection with white. Deselect. Your image should now look like fig. 3.
|
||
| Select
the Move Tool. Now move the white line 1 pixel down by pressing the down arrow key once. Change the layer mode from Normal to Soft Light.
|
||
| This
also works fine on larger selections. Select the Rectangular Marquee Tool and make your desired selection. Now repeat step 3 and 4.
|
||
| Your
final image should now look like figure 5.
|
||
|
The same image as Figure 5, but I duplicated the white shadow layer to show you how to make it stand out a little more
|
||


Only permitted Images and Material may be downloaded from this web site.