 |
  |
|
|
|
|
This is a very easy tutorial, and I know plenty of other sites has covered this issue, but still I get so many e-mails from people asking how to make scanlines etc., so I decided to make my own tutorial about this. First I'll show you how to make a little bit different pattern, and further down I'll show you how to make those classic scanlines. First: Start by opening the image
you want to apply the pattern. |
|
|
|
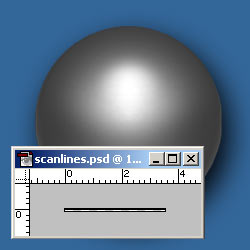
Then create a new image 5 x 5 pixels,
transparent background. The image in figure 1 is zoomed in a little
bit to be more readable. Keep your selection and go to Edit - Define Pattern. Go back to the image you started with, and be sure you create a new layer where you want to apply the pattern. |
|
 Figure 3 |
At the new layer - I called mine
pattern - select the Paintbucket Tool and change the Fill options
window from Foreground to Pattern. This is a nice effect, but I wanted
to spice it up a little bit. By adding a simple Bevel and Emboss
to the layer your pattern could look like figure 3. I used this settings (PS 5.5): Use these setting if you use PS
6: |
|
|
|
To
make an oval shape with faded edges you can easily do this by: Select the Elliptical Marquee Tool and select an area of your choice. Then go to Select - Feather - 15 pixels (Select - Modify - Feather if you use PS 5.5). Make sure you're on the pattern layer and hit Ctrl + Shift + I to inverse the selection. Now hit the Delete key a couple of times and your image should look similar to my fig. 4. |
|
|
|
Here
you see my final example! I used this effect on one of the logos I was working on when I started out making this new site. |
|
|
|
Here's
another example on how you can work with patterns. This is how I make
my scanlines: Create a new image, height = 2 pixels and width = 50 pixels. Hit D to make black your foreground color. Now select the Rectangular Marquee Tool and check the Fixed size option in the Style window at the top of your screen). Now set the height to 1 pixel and the width to 50 pixels or more. If you use PS 5.5 just select the Single Row Marquee Tool. Select the upper pixel of the image and fill your selection with black. Now go to Select - All + Edit - Define pattern. PS 5.5: Select the Paintbucket Tool, and change the fill option to pattern. Select the area you want filled with the pattern and create a new layer on top of the image layer. Now fill your selection. To create a different effect play with the layer modes and the opacity. For instance you get a pretty cool effect changing the layer mode to either Overlay or Soft Light. |
|
|
|
Now
to those of you who use PS 6: I just love the new feature in PS 6 with layer styles. They're so easy to use, and if you want the exact same effect on another layer you just copy and paste the effects! A real time-saver! Select the layer you want the scanline effect on. Now click the Add a layer style button In the pattern option window select the scanline pattern we created. For this image I change the Blend mode from Normal to Soft Light, and I set the opacity to 56 %. Click OK and your finished! |
|
|
|
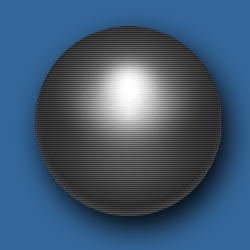
Here
you see my final example. |
|


Only permitted Images and Material may be downloaded from this web site.