 |
  |
|
|
|
|
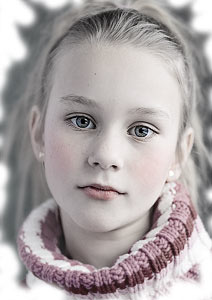
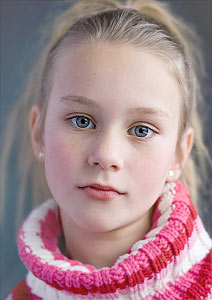
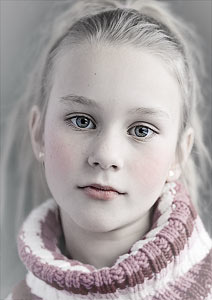
This
is how my original picture looked like. The background is a bit dark so I wanted to lighten that a bit, plus I wanted to lighten the shadows on the left side to decrease the overall contrast in the picture - making it looking as soft as possible before I added the desaturated hand colored effect. Ok - let's get started.
|
|
|
|
Select
the Lasso Tool (L) Click
the Create new fill or adjustment layer button located on the Layers
palette (Keep in mind that a lighter background might need just an adjustment in the middle tones. A light background might not need to be altered at all). |
|
|
|
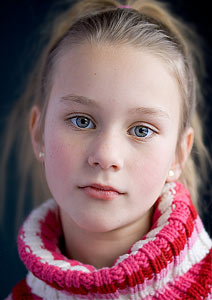
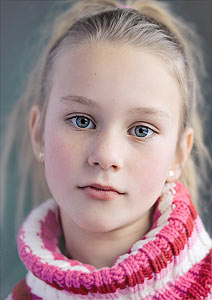
After you've added the curves adjustment layer just deselect your selection (CTRL + D). The picture on the left shows how my picture looks like after adding the adjustment layer. In addition to lighten up the background more details are showing in the hair. |
|
|
|
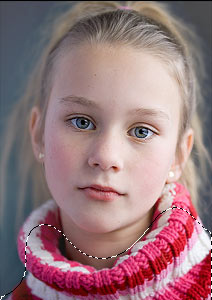
Now I wanted to lighten the turtle neck on her sweater a little bit. Those strong contrasty colors really steals attention from her eyes. (Yet I don't want to crop out the sweater either because I think those pink colors compliment her skin very well). Ok
- same technique as above. The Lasso Tool (L) to create the selection.
Selection - Feather - and a pretty large amount to smoothen the
selection. (To
add the Levels adjustment layer click on the Create new fill or
adjustment layer button located on the Layers palette |
|
|
|
CTRL + D to deselect my selection. As you can see on the left the picture now look much lighter and her turtle neck is a but softer in the colors as well.
Ok - now to lighten up the shadows on the left side of her face a little bit... |
|
|
|
Again I used the Lasso Tool (L) to make my selection. I selected all of the picture except those light areas on the right side. Then I feathered the selection with an amount of about 100 pixels. (For pictures downsized for the web you might not need more than about 20 pixels - it's the size of the picture that decides the amount). Then I added a Curves Adjustment layer (like explained above) with these settings. Again CTRL + D to deselect my selection as soon as I've added the adjustment layer. (You can adjust the adjustment layer afterwards with a soft white brush to add to the selection, or a black brush to subtract from the selection - just paint directly on the adjustment layer itself). |
|
|
|
Now
my picture looked like the one shown on the left side. I could have stopped here, but I continued to play and trying out different settings some more. The next step really isn't necessary, but I'll show you what I did anyway since I think it added some extra glow and evened out her face a little bit more. If the next step doesn't suit your image just forget all about it - or you can keep the technique in mind for other pictures).
|
|
|
|
On this step I added a Hue/Saturation adjustment layer with these settings. Then I lowered the opacity to 40% and changed the mode to Overlay (you find all these settings in the layers palette). To modify the highlights on this layer I added a new adjustment layer but this time I added it from the Layer drop down menu; Layer - New Adjustment layer - Curves - and then I checked the "Use Previous Layer to Create Clipping Mask" option. I then
used these settings. Ok - not much difference - but her skin is more even with a slight glow to it. |
|
|
|
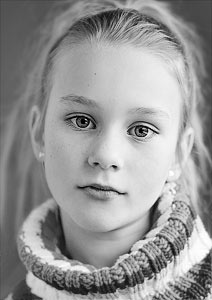
Now to the fun part :) Set black as your foreground color and white as your background color. Hit
the Create new fill or adjustmentlayer tab Now turn down the opacity on the Gradient Map layer to approx 74%.
|
|
|
|
Still with black as your foreground color select a soft brush and turn down the opacity to about 20-30%. Now
gently use the brush to paint back some of the colors (directly
on the Gradient Map leyer). And now we're done! Well almost - I desided to add a couple of more steps... |
|
 |
I wanted to add a more soft frame around her face. To do that I added a new layer and used a white brush to draw some white areas in the corners and some on the side.
|
|
|
|
I then did a Blur - Gaussion Blur - and added an amount that really softened the strokes and made them all blurry like shown in the picture on the left. | |
 |
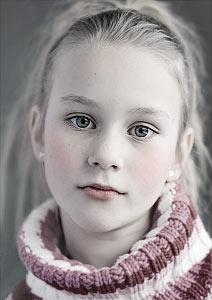
Final step before I was happy! When
all this was done I felt her eyes needed to be lightened a bit,
and used the Lasso Tool to select the area around both her eyes
(be sure to check the "Add to selection" option to be
able to select the area around both eyes Select - Feather - think I used about 30 pixels here to soften the selection. I then added a Levels adjustment layer with these setting to lighten the eyes to my liking. CTRL + D to deselect.
|
|
 |
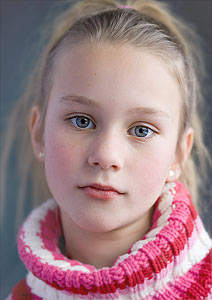
The final result!
Hope this tutorial was of help and that you got some ideas you can use :)
|
|


Only permitted Images and Material may be downloaded from this web site.