 |
  |
|
|
 |
Photoshop
7 It is really easy to learn this tool too - so get those pictures ready! We're gonna deduct ages from your family members - and having lots of fun while doing it! A tip
along the way:
|
|
 |
Select
the Healing Brush tool If you're not happy with the outcome go back - select a new sampling area and drag the brush over the area you want healed all over again. Do this until the lines are gone and the skintones look realistic. Now
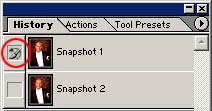
- this is REALLY important. Be sure to create a snapshot
of your work at this state. You'll soon understand why...
|
|
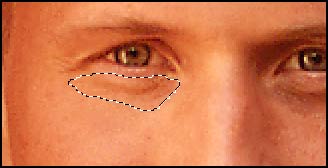 |
Time
to use the Patch tool (Don't find the Patch tool? Click here to see where it's located).
|
|
|
|
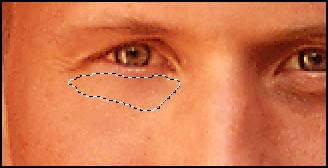
Now
drag the selection to an area that has about the same color and texture
as the area you want to replace - and just release the mouse button. |
|
|
|
The
original area below the eye is now automatically replaced! Deselect again. |
|
|
|
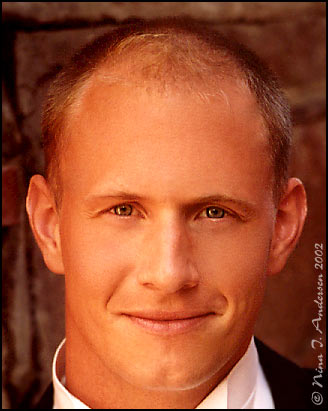
In
step 6 you can see what my image looked like at this point. BUT
- it really looks kind of fake. Before you go any further be sure to create another snapshot.
(I always take a lot of snapshots while doing photo retouch. Makes it so easy to go back and do things all over again if you're not happy with the outcome...). |
|
 |
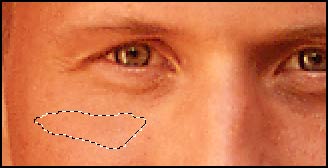
Select
the History Brush tool (If you accidentally activate the Snapshot 1 state just click the Snapshot 2 state - or just go down in the History window and click on the latest action before you continue). Select a brush that suits the area you're going to work on. Click here to see what kind of brush settings I used for this area. As you can see I lowered the opacity to 21%. That's because I just wanted to paint some of the details back. Now
use the brush below the eyes and carefully "paint" some
of the details back! And
now you're on your own!
|
|
  |
||
|
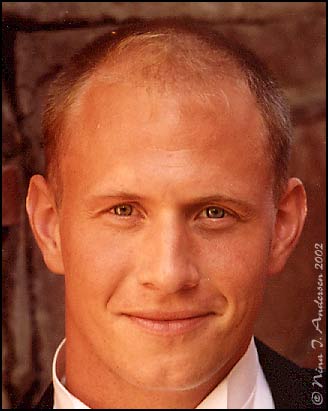
Original picture This is how the picture looked right from the scanner. Before I started using healing brush tool I did and Image - Adjustments - Auto Color to get rid of the magenta color cast on the picture. Then did an Auto Brightness/Contrast and an Auto Levels. That did the trick for this particular picture. To sharpen the picture a little bit I used the Unsharp mask (Filter - Sharpen - Unsharp mask) with these settings. (Note that different pictures need different unsharp mask settings...). Then I added a Hue/Saturation adjustment layer and added just a little more color. The rest of the process editing this picture is described in the steps above. |
Final image This
is how my picture turned out in the end. I continued working on
it just using the Healing Brush tool after the last step. Just
working on small skin areas at the time to get rid of the irregularities
of the skin. Making the skin look really smooth and flawless. |
|

Only permitted Images and Material may be downloaded from this web site.