 |
  |
|
|
 |
Finally! So roll up those shirtsleeves and flex those PS muscles - it's Interface time! PS! By clicking the small thumbnails you will be able to see a big screenshot... |
|
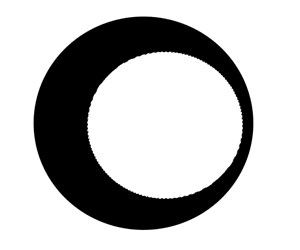 Fig. 1 |
Ok
- here we go... This interface covers quite a few of the techniques I use making interfaces, so it turned out pretty long, but from the e-mails I have received from some of you that's what you want :o) I started out making a new file - 600 x 500 pixels big. White background. Create a new layer (call this Interface body) and select the Elliptical Marquee Tool and select a circle of your choice. Fill the selection with black. The use the Elliptical Marquee Tool to select a smaller circle inside the original circle according to fig. 1 and hit the Delete key. (The examples are resized to 50% of the original size...). Now duplicate the Interface body layer and hide the original - we are going to use the original layer later. |
|
 Fig. 2 |
Then
use the Elliptical Marquee Tool so select an ellipse according to
fig. 2. Start at the top and hit the Delete key to get rid of pieces of the Interface ring. I then moved the selection 40 pixels down for each time I hit the Delete key until my image looked like fig. 2. Deselect. |
|
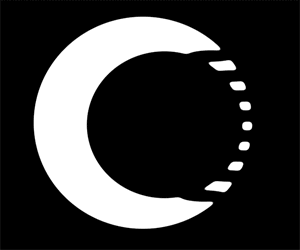 Fig. 3 |
Now
select the Interface body copy layer by hitting Ctrl + left
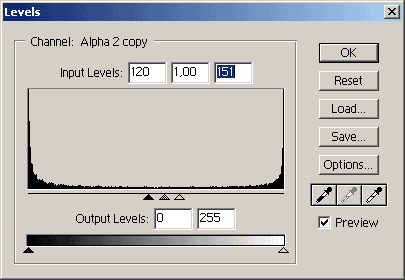
click the layer. Now go to Filter - Blur - Gaussian Blur - 4 pixels. Then go to Image - Adjust - Levels - and drag the arrows towards the center until your image has nice clean edges. To have a look at my settings click here. (Name this channel Interface). |
|
 Fig. 4 |
Go
back to the layer window and create a new layer called Interface. Fill your selection with any color - I used a gray color, but it doesn't really matter what color you use. It's going to change as soon as we add the layer styles... |
|
 Fig. 5 |
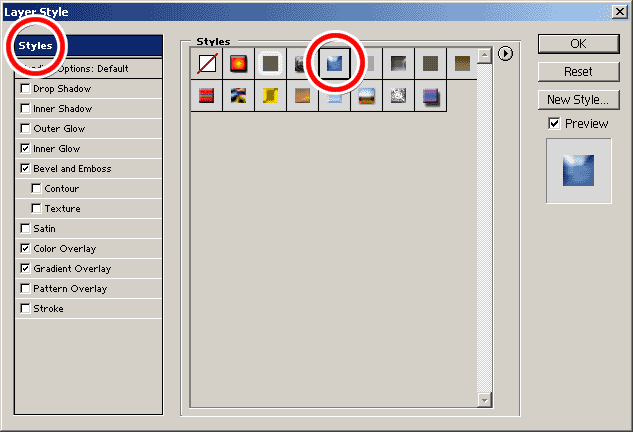
Now the fun begins! It's
layer style time! Click here to see where to find it. In addition I also added a soft drop shadow. |
|
 Fig. 6 |
Ok
- It's time to get back to the original Interface body layer
that we hid in step 1. Go to Select - Modify - Contract - 5 pixels - OK. Then
hit Ctrl + Shift + I to inverse the selection.
|
|
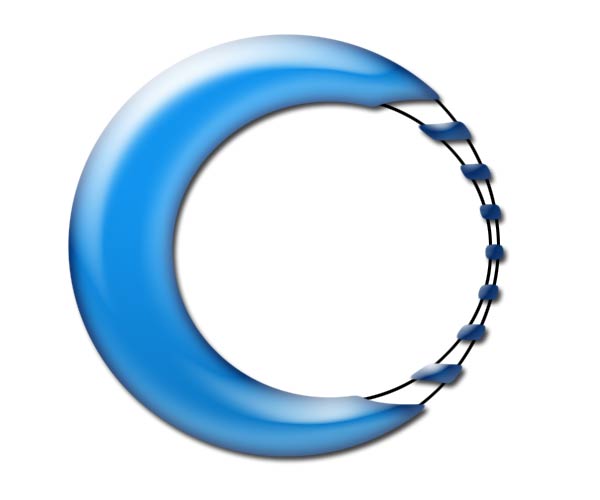 Fig. 7 |
Select the layer again (Ctrl + left click); Select - Modify - Contract - 3 pixels - OK.
Your image should now look like figure 7. The basic Interface is now ready, but it looks kind of boring. It's
time to add some details! |
|
 Fig. 8 |
Activate the Interface layer and select it. Got
to Edit - Copy Merged. Then Edit - Paste. Select
the Interface details layer and go to Select the Rectangular Marquee Tool and make a selection similar to mine in figure 8. |
|
 Fig. 9 |
Then
hit the Delete key to get rid of the selected area. Then I moved the selection about 12 pixels (use the arrow keys) for each time I hit the Delete key until my image looked like figure 9. |
|
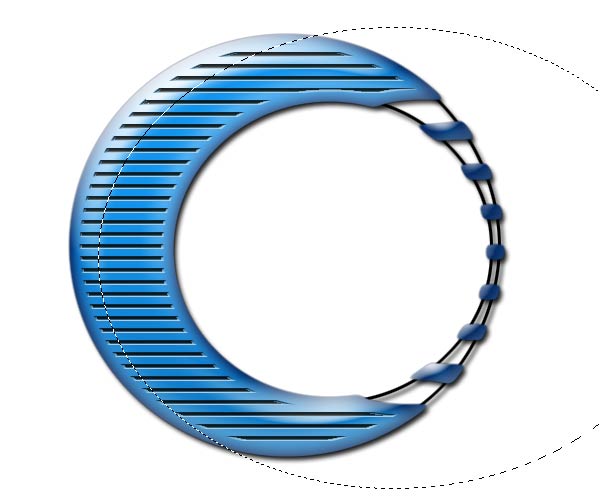 Fig. 10 |
The Select the Elliptical Marquee Tool and make a selection similar to mine in fig. 10. The hit the Delete key to get rid off the selected area. |
|
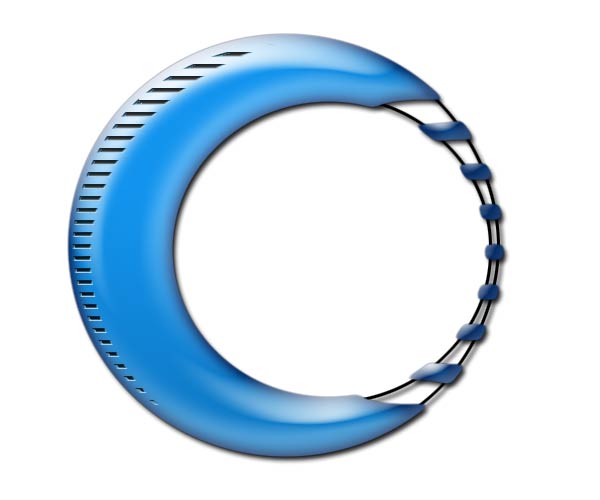 Fig. 11 |
I then moved the Interface details layer a few pixels to the left (select the Move Tool and use the arrow keys). Your image should now look like fig. 11. |
|
|
|
Only permitted Images and Material may be downloaded from this web site.