Please note, this is a STATIC archive of website www.eyesondesign.net from 07 May 2019, cach3.com does not collect or store any user information, there is no "phishing" involved.
|Home|   |PShop tutorials |   |Free Sets|   |About me |   |Links|   |Forum|   |E-mail|


Open a new image - white background. Mine is 650 x 50 pixels.
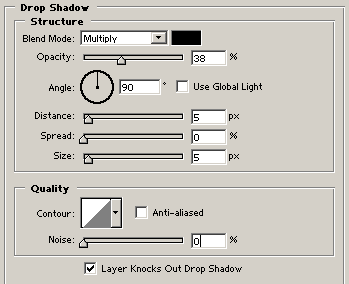
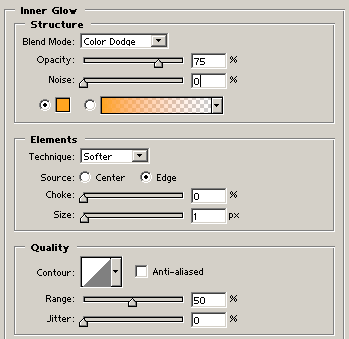
Create a new layer an select the Rectangular Marquee Tool.
Select an area about the height in my image and fill it with any color.


Now it's time to add some layer styles .
Add a Gradient Overlay using my gradient. Download it here.
To have a look at my Gradient Overlay settings click here.
Then add Stroke - 1 pixel - Outside - Opacity 100 % - Color Black.
Then add a nice Drop Shadow - to see my settings click here.

Duplicate the button layer and move it below the original button layer.
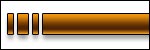
Then hide the button layer copy - we'll soon get back to it...


Then it's time to add some details to the button bar.
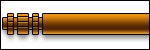
Select the Button layer.
Use the Rectangular Marquee Tool to select the desired areas and then hit the Delete key to get rid of the selected areas.


Then I added some insetlines to add some details.
I changed the layer mode on the white lines to Soft light.

Select the Button copy layer, and go to Edit - Transform - Scale - Height 56 %. (Hit Return 2 times to set the new height).
Then I moved the Button copy layer 1 pixel up.


Now it's time to add some text to our button bar.
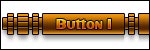
I used font: SF Intellivised - Color #D8D7E1
Layer mode: Overlay
Inner Glow with these settings (color: #FFA520).
Stroke: 1 pixel outside - color black.


And now it's time for the last detail.
I selected a part of the details at the end of the buttonbar - Edit - Copy Merged - and then pasted it on top of the button bar.
Quick and easy!

And the finished result you see below - Hope you'll have fun with it :)


© Copyright Nina Indset Andersen 2000 - 2003. All rights reserved.
Only permitted Images and Material may be downloaded from this web site.