 |
  |
|
|
 Figure 1 |
First I made
the text using the Chrome
text tutorial. I just changed the text color to beige (#C8A46E), and changed the "stroke color" to brown (#5B3714). You are finished with the basic text after you have made the first adjustment curves layer (fig. 10 i the chrome text tutorial...). Your image should now look something like my fig. 1. |
|
 Figure 2 |
Then I ran
a numeric transform: (If you want your text to remain horisontal you just go straight to the next step...). |
|
 Figure 3 |
Then I wanted to add some drop shadow to the text. Layer - Effects - Drop Shadow. I used this values: |
|
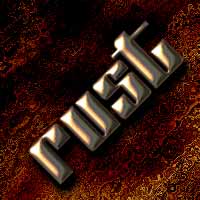 Figure 4 |
Then I added
a hue/saturation adjustment layer to lighten the text a little bit:
Layer - New - Adjustment Layer - Hue/Saturation + Group with previous layer. Hue: 0 |
|
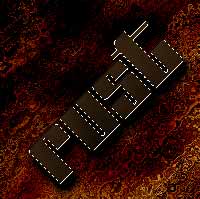 Figure 5 |
Create a
new layer. Make brown your foreground color (#8C6636) and black your background color. Hold down the Ctrl-key and left-click the text layer to select it. Now go to Filter - Render - Clouds. Deselect. Your image should now look like fig. 5. |
|
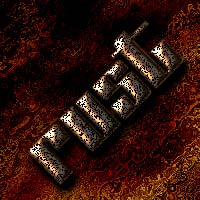 |
Now change the Layer Mode from Normal to Dissolve, and turn the opacity down to 31. Duplicate this layer by dragging the layer down to the Create New Layer tab. Change the Layer Mode on this layer from Dissolve to Color Burn and turn the opacity down to 10. That's it! Now your text should look somewhat old and rusty :=) |
|
|Home| |PShop tutorials| |Free Sets| |About me| |Links| |Forum| |E-mail|
Only permitted Images and Material may be downloaded from this web site.