 |
  |
|
|
|
|
Photoshop 6 I have been playing around, trying
to learn some of the new features in Photoshop 6, and I ended up
with this speaker. Well - have fun! |
|
|
|
Start with opening a new image, 250 x 250 pixels, white background. Create a new layer and call it "circle".
|
|
|
On
the "circle" layer apply these Layer Styles:
|
||
|
|
I also
stroke the layer with these settings: Size: 1 px Position: Outside Opacity: 47 % Fill type: Color Color: Black Your image should now look like fig. 4. |
|
|
|
Create a new layer below the
circle layer. With the Elliptical Marquee Tool
create a new circle a few pixels bigger than the first circle.
|
|
|
On the "circle 2" layer apply these Layer Styles:
Your image should now look like fig. 5.
|
||
|
|
||
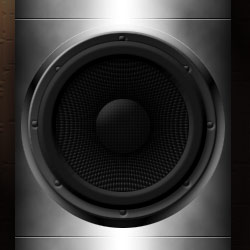
 Fig. 2 & 3
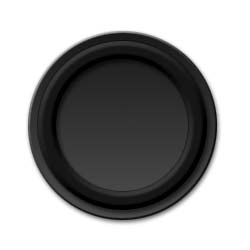
 Fig. 6 & 7
|Home| |PShop tutorials| |Free Sets| |About me| |Links| |Forum| |E-mail|
Only permitted Images and Material may be downloaded from this web site.